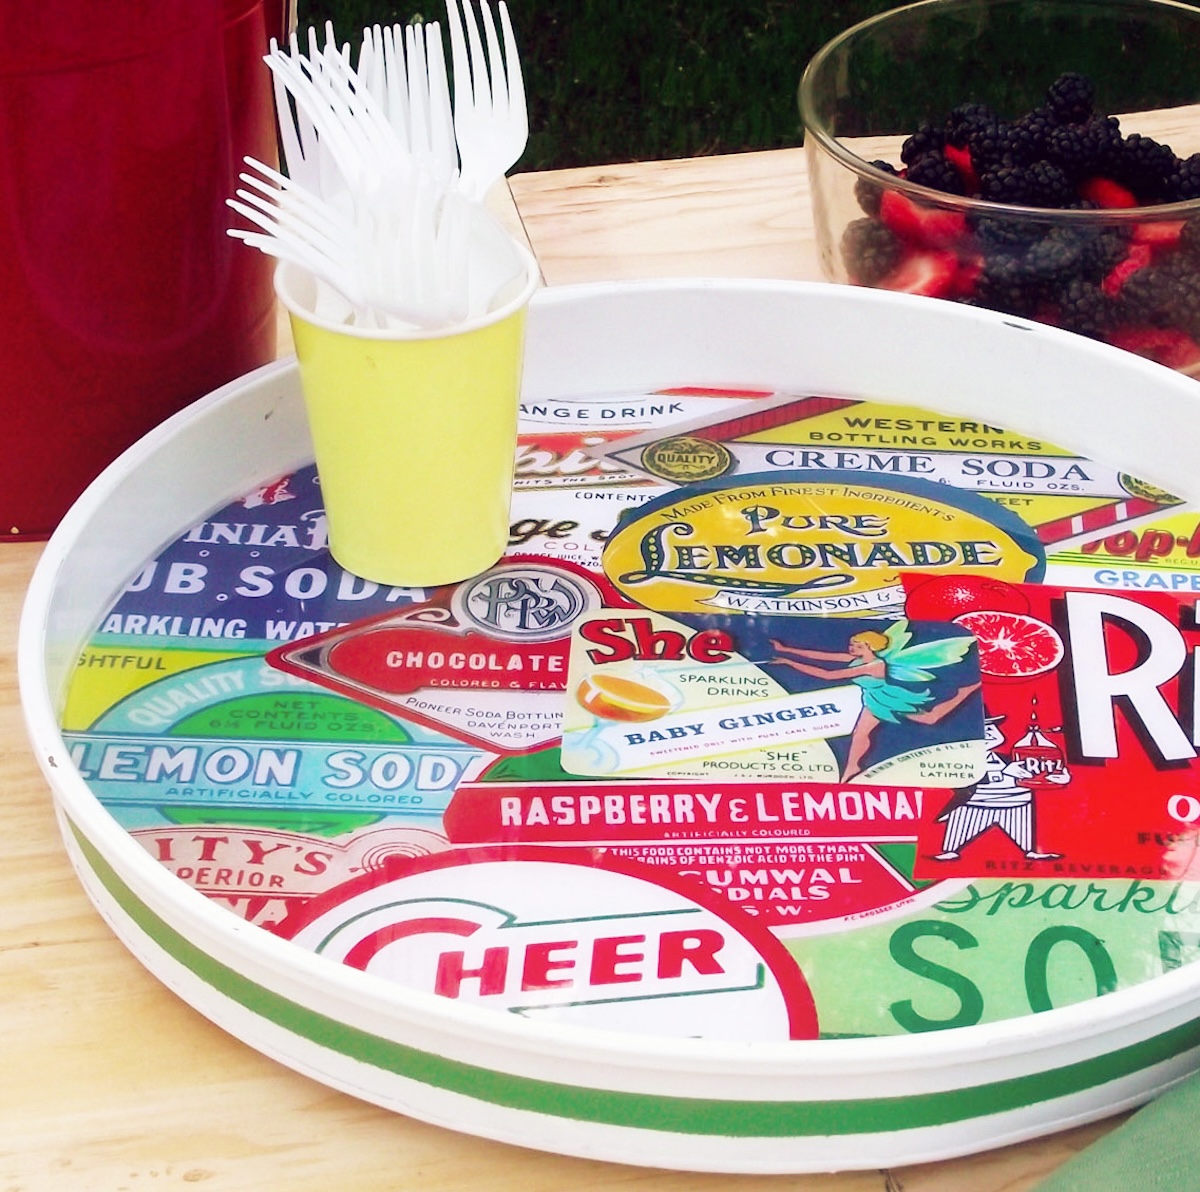
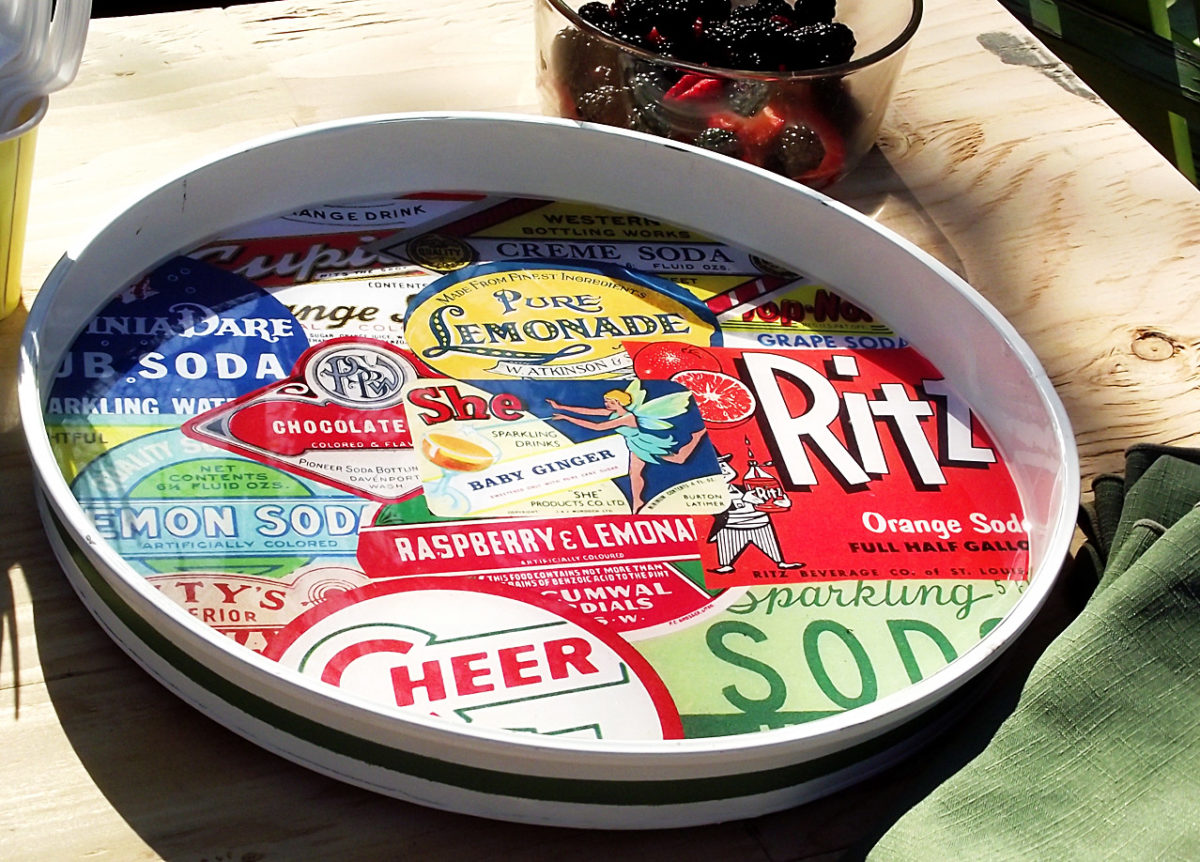
This DIY lazy susan is so cool – it was created from a planter saucer! Use any pictures you want. That is good in your dinner desk, for a celebration, or for a cupboard.
Expertise Required: Newbie. You’ll be printing pictures, reducing to suit a tray, after which including resin on prime. The largest talent you want for this challenge is endurance within the drying time!
Man Podger David had an important thought to show a easy planter right into a DIY lazy susan for summer time events. It’s such an important challenge that I’m certain you’ll need to duplicate the method for different house decor items. For those who like resin crafts, preserve studying for his tutorial!
So, you understand me by now – I’m at all times wandering round Dwelling Depot in search of issues to make into different issues. For this decoupage challenge I had in thoughts that summer time is right here, together with outside events.
Once I noticed some huge, steel planter saucers (you understand, the type you set below a pot to catch water and shield the ground) on sale I believed, “hmmmmmm . . . lazy susan?”
This DIY lazy susan turned out to be effortless and fairly enjoyable!
Collect These Provides
- Metallic planter saucer
- Mod Podge Gloss
- Laserjet printouts of classic pictures
- Newspaper or 2 sheets of paper
- Foam brush
- Envirotex Lite (to make all of it waterproof and stuff)
- Plastic straw (not pictured)
- Stirring sticks
- Plastic cup
- Lazy Susan mechanism (additionally from Dwelling Depot)
- Sandpaper (not pictured)
- Glue – I used E-6000
- Scissors
- Pencil
- Spray paint (non-obligatory)
- Painter’s tape (non-obligatory)
For this challenge, you should utilize classic graphics or labels, your favourite pictures, inspirational quotes, or the rest that floats your boat. I might anticipate no matter you utilize, will probably be layered if it’s a number of pictures.
Get the printable how one can card under:
Home made Lazy Susan
Discover ways to make a lazy susan with a planter tray from Dwelling Depot! You need to use any graphics to customise.
Prep Time45 minutes minutes
Lively Time1 hour hr
Dry Time1 day d
Complete Time1 day d 1 hour hr 45 minutes minutes
Yield: 1 tray
Price: $10
-
Clear your tray with gentle cleaning soap and water and let dry.
-
Use painter’s tape to part off a line to make a stripe (non-obligatory). Spray with a number of coats of spray paint, take away tape, and let dry.
-
Make a template for the within of the tray utilizing newspaper or paper and a pencil. Minimize out with the scissors and put aside.
-
Connect the lazy susan mechanism to the underside heart of the tray with E-6000; let dry.
-
Print out all pictures you wish to use on a laserjet printer. Minimize out and assemble them right into a collage (you possibly can tape if wanted).
-
Place the template on prime and hint the define of the circle. Minimize out with scissors. Match within the tray and trim if mandatory.
-
Mod Podge the photographs into the tray, layering as mandatory. Seal completely, ensuring to get all edges. Let dry in a single day.
-
Combine the Envirotex Lite in line with bundle directions. Pour into the tray. Enable tray to totally remedy for about 24 hours earlier than utilizing.
Step 2: My tray was BIG (16” extensive). To make a template for the within, I traced the perimeters of the tray onto two massive sheets of paper after which taped them collectively. You might additionally use newspaper.
Step 5: I used graphics I had available, however you possibly can simply use scrapbook paper or wrapping paper or something that appeals – simply take a look at it to verify it holds as much as the Mod Podge.
I laid out the design in MS Phrase, however I didn’t need to have to chop out and paste every picture. As a substitute I printed them out in sections on 11 x 14” authorized paper after which reduce every part out.
For those who solely have an inkjet printer, I’d attempt to get laserjet pictures printed to ensure you don’t have any bleeding. For those who don’t have that choice accessible, you should definitely spray the inkjet pictures on each side with clear spray sealer and let dry earlier than utilizing.
Step 7: You don’t need the resin attending to the photographs as it could discolor them. Seal the photographs properly if they’re printed at house.
Step 8: Pop air bubbles by blowing on the floor of the resin with a plastic straw (don’t contact the straw to the floor).
For those who loved this DIY lazy susan, I’d love so that you can try these different concepts: