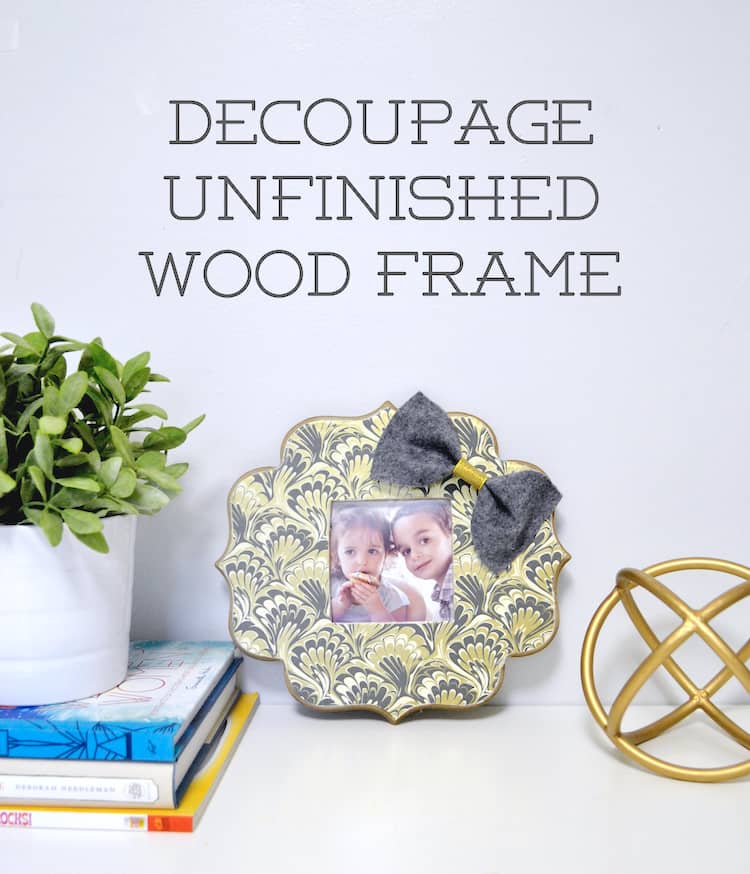
If you happen to’ve ever discovered a lovely piece of paper begging for use in a craft, this decoupage image body is ideal – so simple to make!
If you happen to’ve ever in your life stepped right into a craft retailer, then I do know you’ve seen these cheap wood frames within the unfinished wooden part. Would you consider that that is the first time I’ve ever purchased and adorned one myself?
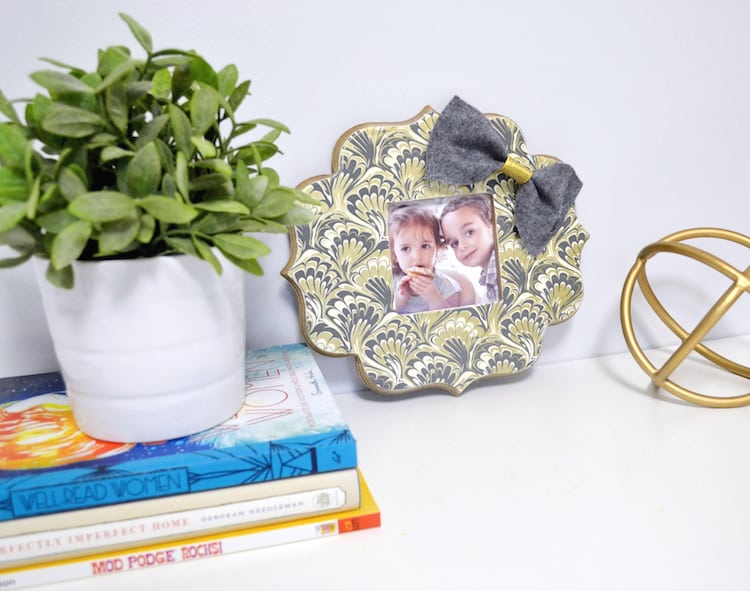
It’s true. I don’t know why, however they’ve by no means appealed to me earlier than . . . till I purchased this beautiful handmade paper from Paper Supply.
This paper was simply begging to be Mod Podged onto an unfinished body . . . and I LOVE the outcomes! Right here’s how one can make this DIY photograph body.
Decoupage Frame
Collect These Provides
- Mod Podge Matte
- Unfinished Wooden Frame
- Paper
- Scissors
- Pencil
- Cloth or felt for a bow (elective)
- Sizzling glue gun and glue sticks (elective)
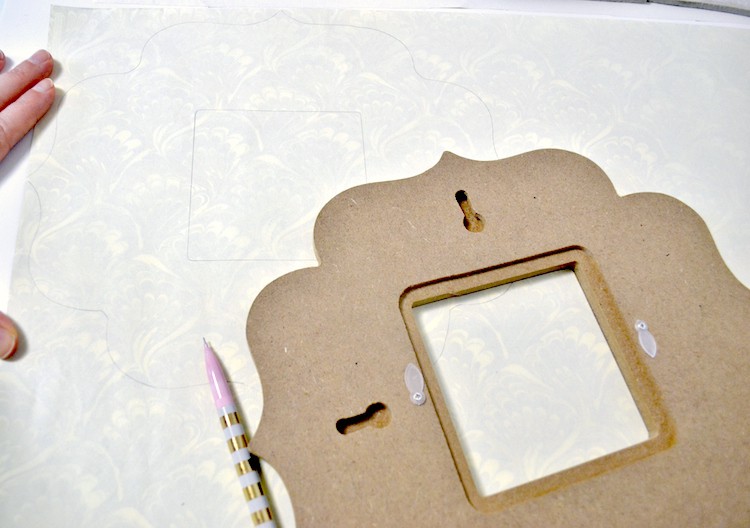
Step 1: On the again of your paper, hint your body (each the surface and the opening the place the photograph goes).
I discovered this beautiful metallic gold, cream and gold paper from Paper Supply, however you need to use any scrapbook or wrapping paper you’d like for this. Minimize out your form.
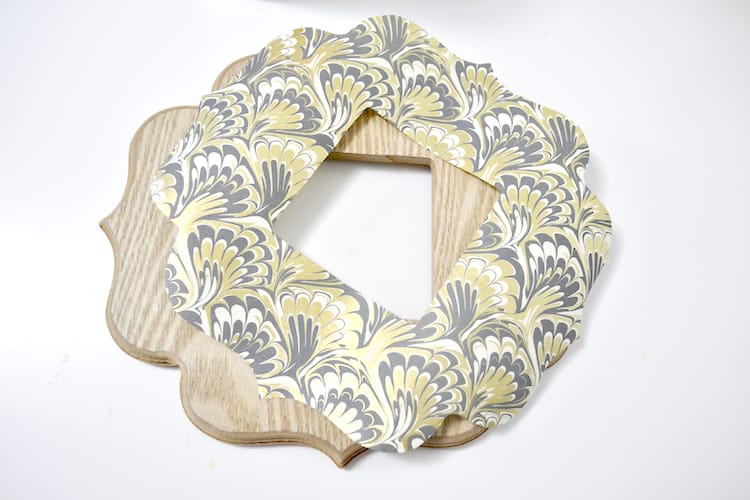
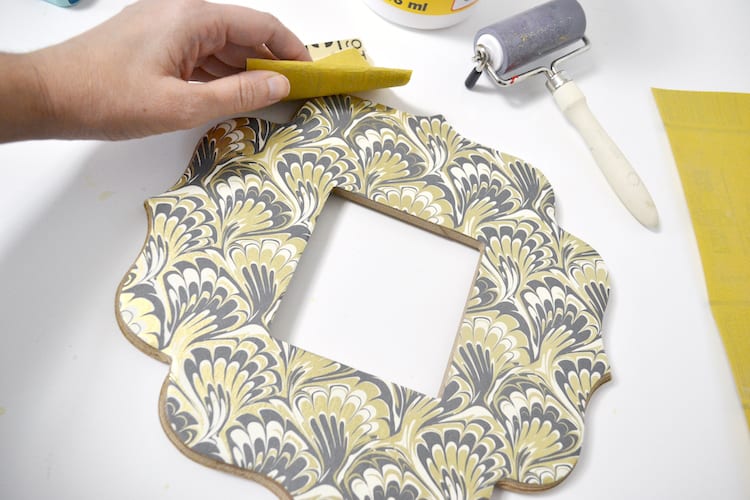
Step 2: Apply Mod Podge to your decoupage image body. Lay your paper over the Mod Podge and press to stick.
It helps to make use of a brayer or perhaps a bank card (one thing with a flat edge) to assist press your paper onto your body.
However even when your paper wrinkles a bit, don’t fear about it – it’s difficult to see, and even helps add a little bit of character to your completed product.
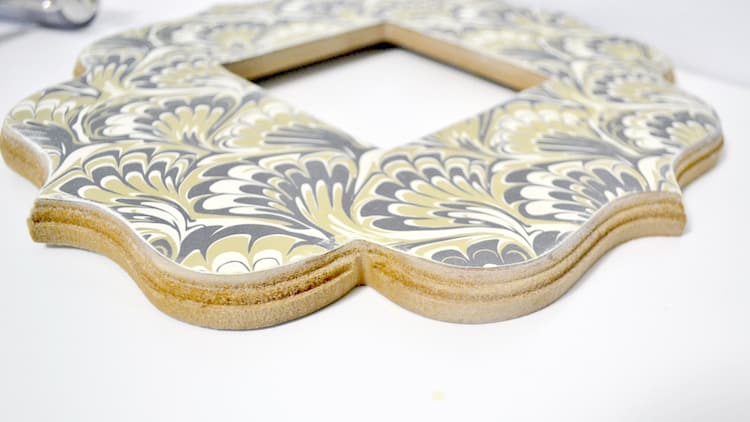
Step 3: Gently sand the perimeters of your body. This step is elective, however I really feel prefer it offers your body a extra completed look.
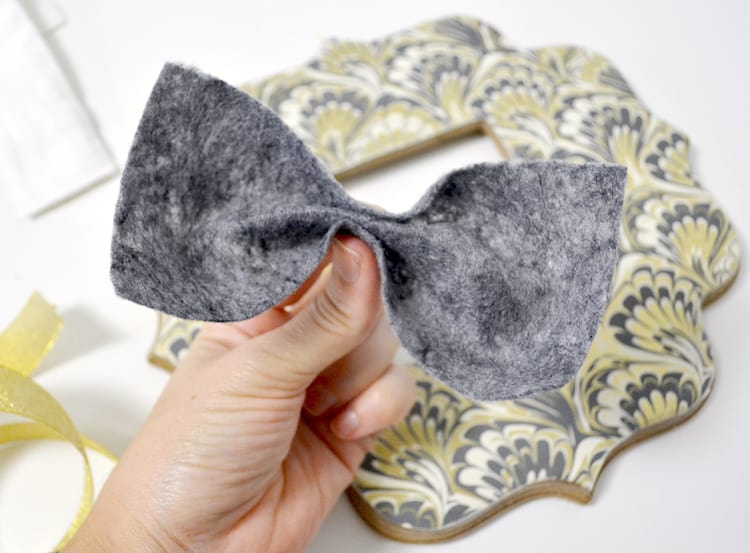
Step 4: You’ll see that I had a size of cream ribbon within the “supplies” photograph, however I wasn’t joyful with how the cream bow regarded with the body, so I went for grey felt as an alternative.
Generally you simply must attempt completely different objects to see what you want finest! My felt piece was 3″ x 6″, and I folded it accordion fashion and scorching glued the ends collectively.
I then took a bit of gold ribbon and wrapped it across the center. I scorching glued the bow to the body and that was it!
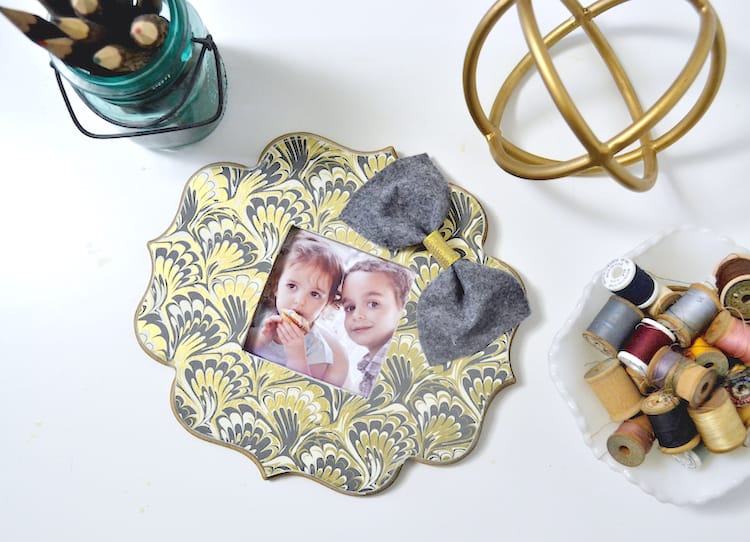
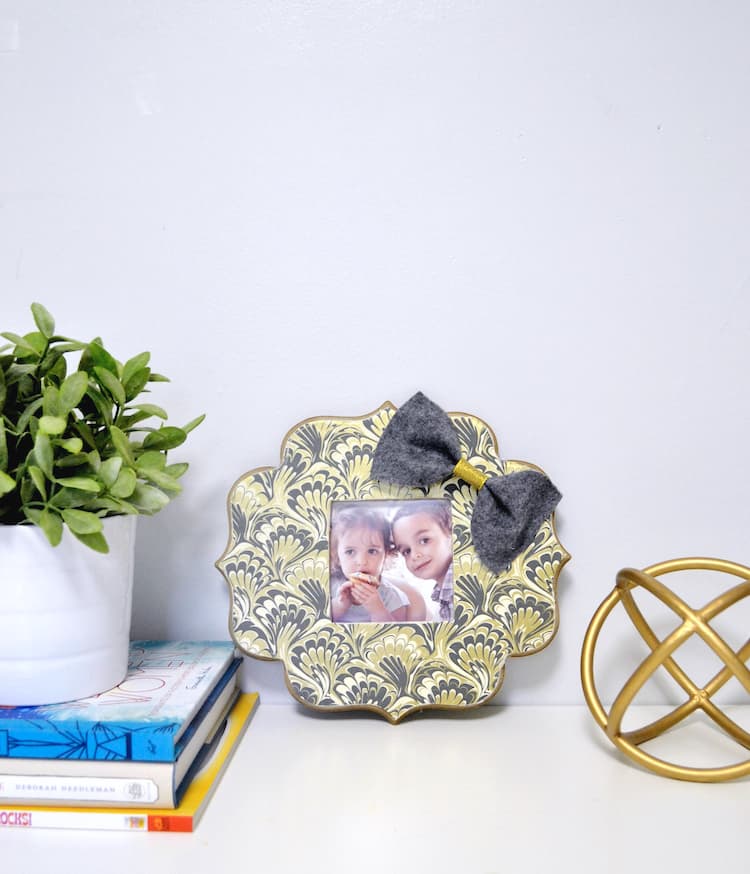
I like how this DIY photograph body turned out . . . I believe it’ll have a house in my craft room for now so I can hold my littles’ faces close by whereas I create!
Truthfully, I can’t consider that is the primary time I’ve decoupaged a wood body, however I promise it gained’t be my final!
Decoupage Picture Frame
Learn to decoupage this image body with Mod Podge! This decoupage body is an simple and cute house decor venture.
Prep Time30 minutes minutes
Lively Time1 hour hr 45 minutes minutes
Whole Time2 hours hrs 15 minutes minutes
Yield: 1 body
Value: $5
-
On the again of the paper, hint the body (each the surface and the opening the place the photograph goes).
-
Apply Mod Podge to the body. Lay the paper over the Mod Podge and press to stick. It helps to make use of a brayer to flatten the paper to the body. Let dry 15 – 20 minutes.
-
Sand the perimeters the place the paper meets to border to clean them and provides your body a extra completed look.
-
Paint two closing coats of Mod Podge on high of the body, letting dry between every. Let dry fully.
-
If you happen to select so as to add a bow or embellishment, do it with the new glue gun right now.
Thanks a lot for letting me share my decoupage image body with you in the present day! I’d love so that you can try these different initiatives as effectively: