With its wealthy taste and lengthy storage life, winter squash is a backyard staple. However in order for you an even bigger, more healthy harvest, the secret’s to give your seedlings a powerful commence indoors. By beginning winter squash indoors, you’ll guarantee earlier yields, stronger vegetation, and higher pest resistance—all earlier than they even hit the backyard.
Our information under will stroll you thru every thing you want to know, from choosing the best seeds to offering the best look after sturdy wholesome seedlings looking forward to outside planting.
This submit might comprise affiliate hyperlinks. If you happen to click on one and buy, I could obtain a fee at no further value. You’ll be able to learn our disclosure coverage right here.
Why Begin Winter Squash Indoors?
Winter squash prefers heat soil; direct-seeded squash usually struggles in chilly, moist circumstances. Beginning indoors permits you to management temperature, moisture, and early development, guaranteeing your vegetation hit the bottom working when it’s time to transplant.
Younger squash vegetation are additionally weak to slugs, squash bugs, cutworms, and different pests. Beginning seeds inside provides your squash a dimension benefit earlier than they face outside challenges, leading to more healthy, extra resilient vegetation.
Selecting the Proper Winter Squash Seeds
Not all winter squash varieties develop the identical. Some take up a variety of house, whereas others are compact and container-friendly.
Greatest for Little Gardens & Containers: Delicata, Acorn, Candy Dumpling
Greatest for Massive Gardens: Butternut, Hubbard, Kabocha, Spaghetti Squash
Greatest for Lengthy Storage: Buttercup, Blue Hubbard, Butternut
Professional Tip: If house is a matter, select bush varieties or practice vining sorts onto a sturdy trellis to save room.
Can You Direct-Sow Winter Squash?
Sure, but it surely requires heat soil (above 60°F) and excellent pest safety. If you happen to choose direct seeding:
Wait till two weeks after your final frost earlier than planting.
Plant seeds 1 inch deep in well-draining soil.
Cowl younger seedlings with row covers to shield them from pests.
Whereas direct sowing is an possibility, beginning indoors provides you a leg up on the season and helps stop early pest harm.
Gathering Provides
Earlier than planting, ensure you have:
Professional Tip: Keep away from common potting soil—it’s too heavy for seedlings. Use a fluffy seed-starting combine as a substitute.
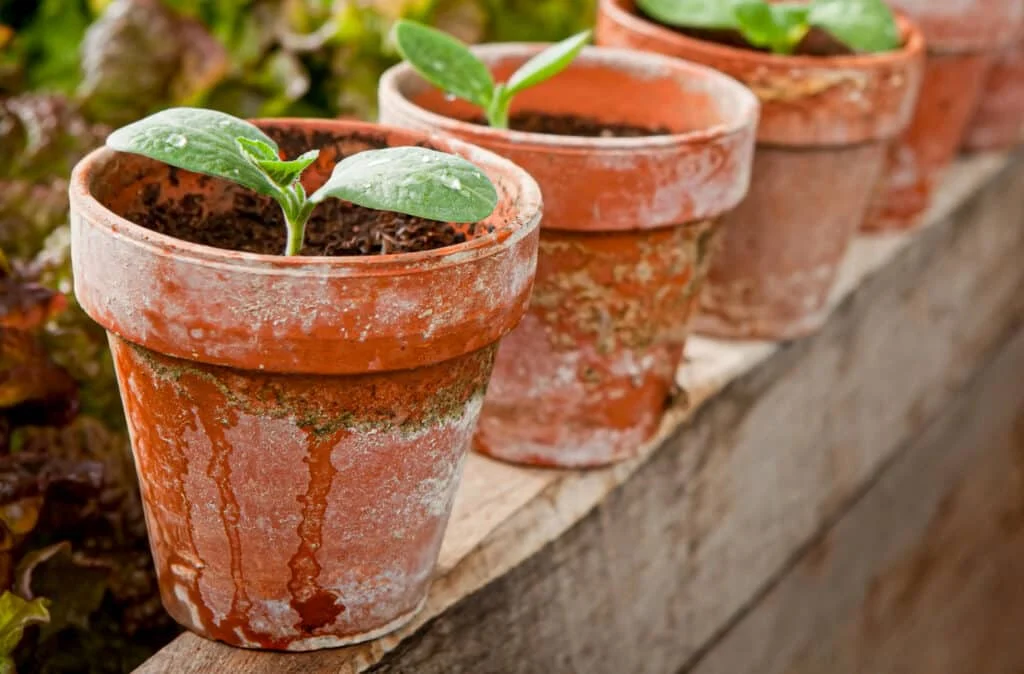
Planting Winter Squash Seeds Indoors
Fill containers with pre-moistened seed-starting combine, leaving about ½ inch of house on the prime.
Make holes one inch deep and drop in one to two seeds per pot to guarantee Germination.
Flippantly cowl with soil, press gently, and blend with heat water to settle the soil.
Label every selection to keep away from mix-ups later—many squash seedlings look the identical.
Offering the Proper Situations for Germination
For quick, wholesome germination:
Maintain the soil temperature between 70–90°F. A warmth mat may also help keep heat.
Keep humidity by masking trays with plastic wrap or a humidity dome.
Germination usually takes 7-10 days.
Professional Tip: If seeds aren’t sprouting after 10 days, examine the soil temperature—cooler temperatures gradual germination dramatically. Beginning winter squash indoors in late winter when windowsills are nonetheless pretty chilly could cause slower germination.
Don’t panic if germination takes somewhat longer! Squash could be a gradual starter, however they’ll pop up quickly with the best heat and moisture.
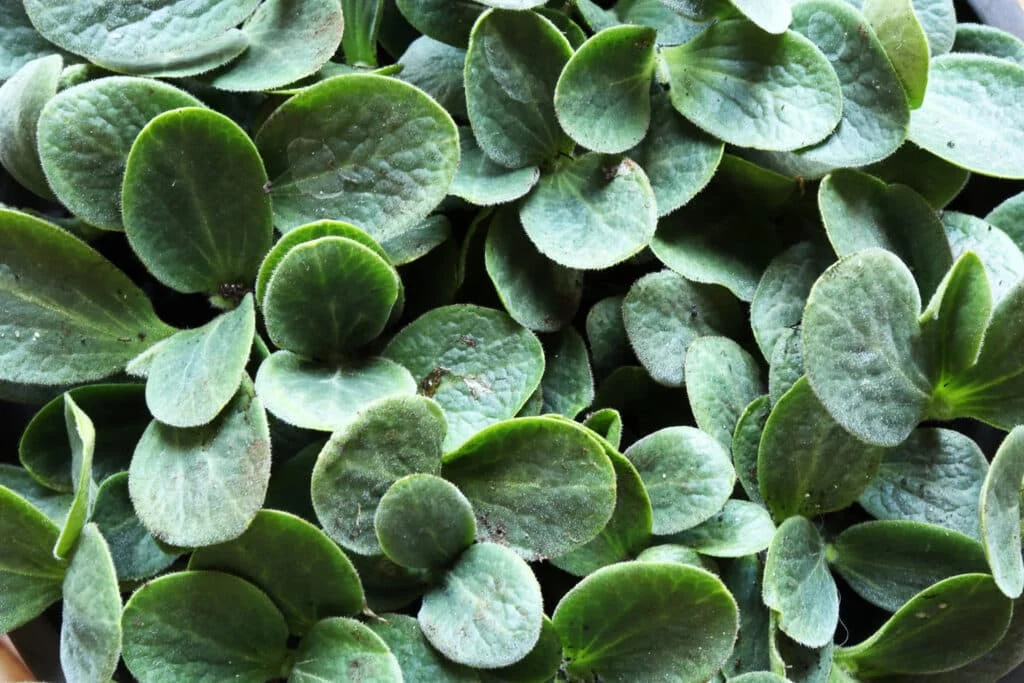
Caring for Squash Seedlings
As soon as your seeds sprout, concentrate on preserving them powerful.
Present 12-16 hours of sunshine per day. Develop lights work greatest.
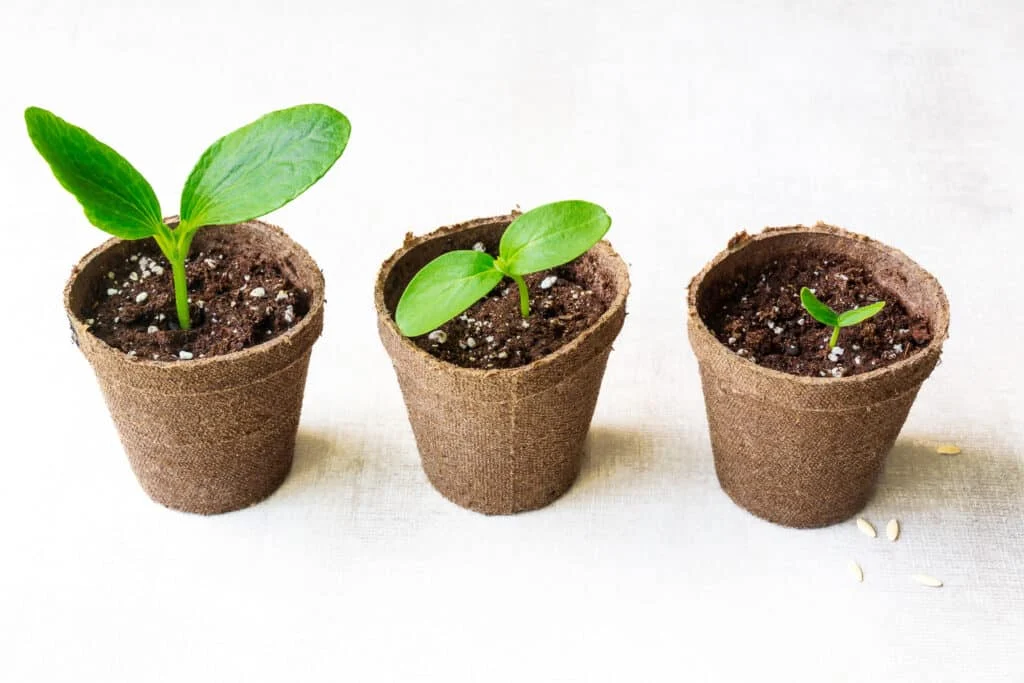
Maintain the soil moist however not soggy. Water from the underside to keep away from damping off illness.
If each seeds sprout, snip the weaker one on the soil degree to keep away from disturbing the roots.
Professional Tip: Rotate pots every day so squash seedlings don’t lean towards the sunshine.
If seedlings look feeble, don’t stress! They’ll strengthen as they develop—preserve the sunshine shut and the watering balanced.
Squash seedlings stretching for the sunshine – these vegetation might conclude up being too leggy and never stocky sufficient for wholesome planting. A sturdy mild supply is required to get wholesome stocky seedlings.
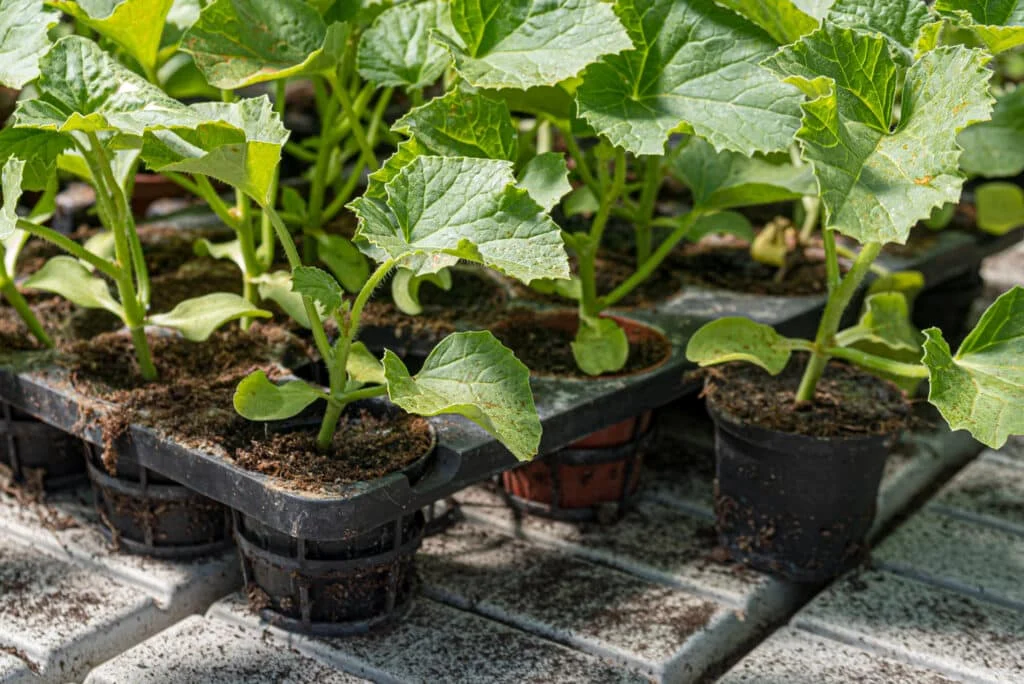
Potting Up: When & How to Repot Squash Seedlings
Winter squash grows shortly and can outgrow tiny containers inside just a few weeks. Transplant seedlings into 4-6 inch pots earlier than transferring them open air.
Transplant into bigger pots crammed with wealthy potting combine.
Water completely and return them to their well-lit rising space.
Professional Tip: Use biodegradable pots to plant the entire thing straight into the backyard later.
As an alternative of potting up in levels, I choose to commence my squash seedlings in bigger containers immediately. It saves me time since I inevitably have to transfer them from tiny trays to greater pots anyway.
Hardening Off & Transplanting Outdoor
To forestall transplant shock, winter squash seedlings ought to be launched to outside circumstances regularly.
Place seedlings in a shaded spot open air for 1-2 hours for the primary three days.
Enhance solar publicity every day over the following few days.
Go away them outdoors all day, bringing them in at evening by day seven to ten.
Transplant into the backyard when nighttime temperatures keep above 55°F, and the soil is heat.
House vegetation 3-4 toes aside for greatest outcomes.
Professional Tip: Add compost to every planting gap for a nutrient increase.
Three Frequent Errors to Keep away from When Beginning Winter Squash Indoors
Planting Too Early
Squash grows quick. If you happen to commence too quickly, you’ll have overgrown, rootbound vegetation earlier than it’s heat sufficient to plant them outdoors.
Answer: Begin seeds 3-4 weeks earlier than your final frost date.
Overwatering
An excessive amount of water leads to damping-off illness, a deadly fungal an infection that kills seedlings on the base.
Answer: Water from the underside and let the prime inch of soil dry barely between waterings.
Skipping Hardening Off
Seedlings want time to modify earlier than being planted outdoors. With out this step, they’ll get sunburned, stunted, or die.
Answer: Step by step introduce them to outside circumstances over 7-10 days.
Professional Tip: New to rising squash? Don’t fear! Even for those who make errors, squash are resilient—they’ll bounce again with correct care.
Troubleshooting Seedling Issues
Leggy seedlings: Transfer them nearer to the develop mild.
Gradual development: Test the temperature—chilly slows improvement.
Yellow leaves: This could possibly be due to overwatering or a nitrogen deficiency.
Associated Posts:
Conclusion: Your Greatest Winter Squash Harvest Begins Now
Beginning winter squash indoors provides you extra vigorous vegetation, earlier harvests, and higher yields. With the best circumstances and care, your seedlings will thrive from day one and reward you with candy, flavorful squash all season.
Creator: Laura Kennedy
Author & Proprietor of Little Yellow Wheelbarrow
Laura is a extremely expert gardener and fervent flower fanatic. Regardless of her playful battle with plant spacing pointers, Laura’s work conjures up gardeners to create thriving, lovely areas that replicate each creativity and sustainability.
Cricut Design House For the next steps, I will be utilizing Cricut Design House. Should you use Silhouette Studio or one other design software program [...]
Mak DIY spooky candle holders utilizing thrifted jars, Mod Podge, and classic photographs. Fast, effortless, and ideal for social gathering decor or y [...]
Printed: Jun 26, 2019 · Modified: Nov 18, 2025 by Shelly · This put up might comprise affiliate hyperlinks · Go away a Remark Want a quick and enjoyab [...]
Make lovely DIY pumpkin magnets with wooden, paint, and Mod Podge! A fast, enjoyable Halloween craft good for adorning or gifting. There’s simply one [...]
Revealed: Mar 10, 2023 · Modified: Dec 3, 2025 by Shelly · This put up could comprise affiliate hyperlinks · 8 Feedback Let’s have fun the month of Ma [...]
Apply the Vinyl Decal Earlier than making use of the decal, clear the floor effectively. I like utilizing somewhat isopropyl alcohol as a result of it [...]
Creating a shocking perennial flower mattress design doesn’t need to be overwhelming—or costly. The key to a panoramic, high-impact backyard isn’t sim [...]
We use cookies on our website to give you the most relevant experience by remembering your preferences and repeat visits. By clicking “Accept”, you consent to the use of ALL the cookies.
This website uses cookies to improve your experience while you navigate through the website. Out of these, the cookies that are categorized as necessary are stored on your browser as they are essential for the working of basic functionalities of the website. We also use third-party cookies that help us analyze and understand how you use this website. These cookies will be stored in your browser only with your consent. You also have the option to opt-out of these cookies. But opting out of some of these cookies may affect your browsing experience.
Necessary cookies are absolutely essential for the website to function properly. These cookies ensure basic functionalities and security features of the website, anonymously.
Cookie
Duration
Description
cookielawinfo-checbox-analytics
11 months
This cookie is set by GDPR Cookie Consent plugin. The cookie is used to store the user consent for the cookies in the category "Analytics".
cookielawinfo-checbox-functional
11 months
The cookie is set by GDPR cookie consent to record the user consent for the cookies in the category "Functional".
cookielawinfo-checbox-others
11 months
This cookie is set by GDPR Cookie Consent plugin. The cookie is used to store the user consent for the cookies in the category "Other.
cookielawinfo-checkbox-necessary
11 months
This cookie is set by GDPR Cookie Consent plugin. The cookies is used to store the user consent for the cookies in the category "Necessary".
cookielawinfo-checkbox-performance
11 months
This cookie is set by GDPR Cookie Consent plugin. The cookie is used to store the user consent for the cookies in the category "Performance".
viewed_cookie_policy
11 months
The cookie is set by the GDPR Cookie Consent plugin and is used to store whether or not user has consented to the use of cookies. It does not store any personal data.
Functional cookies help to perform certain functionalities like sharing the content of the website on social media platforms, collect feedbacks, and other third-party features.
Performance cookies are used to understand and analyze the key performance indexes of the website which helps in delivering a better user experience for the visitors.
Analytical cookies are used to understand how visitors interact with the website. These cookies help provide information on metrics the number of visitors, bounce rate, traffic source, etc.
Advertisement cookies are used to provide visitors with relevant ads and marketing campaigns. These cookies track visitors across websites and collect information to provide customized ads.