This DIY breakfast in mattress tray was created with a $2 thrift retailer discover! Prime with a classic graphic and resin to personalize and make it lovely.
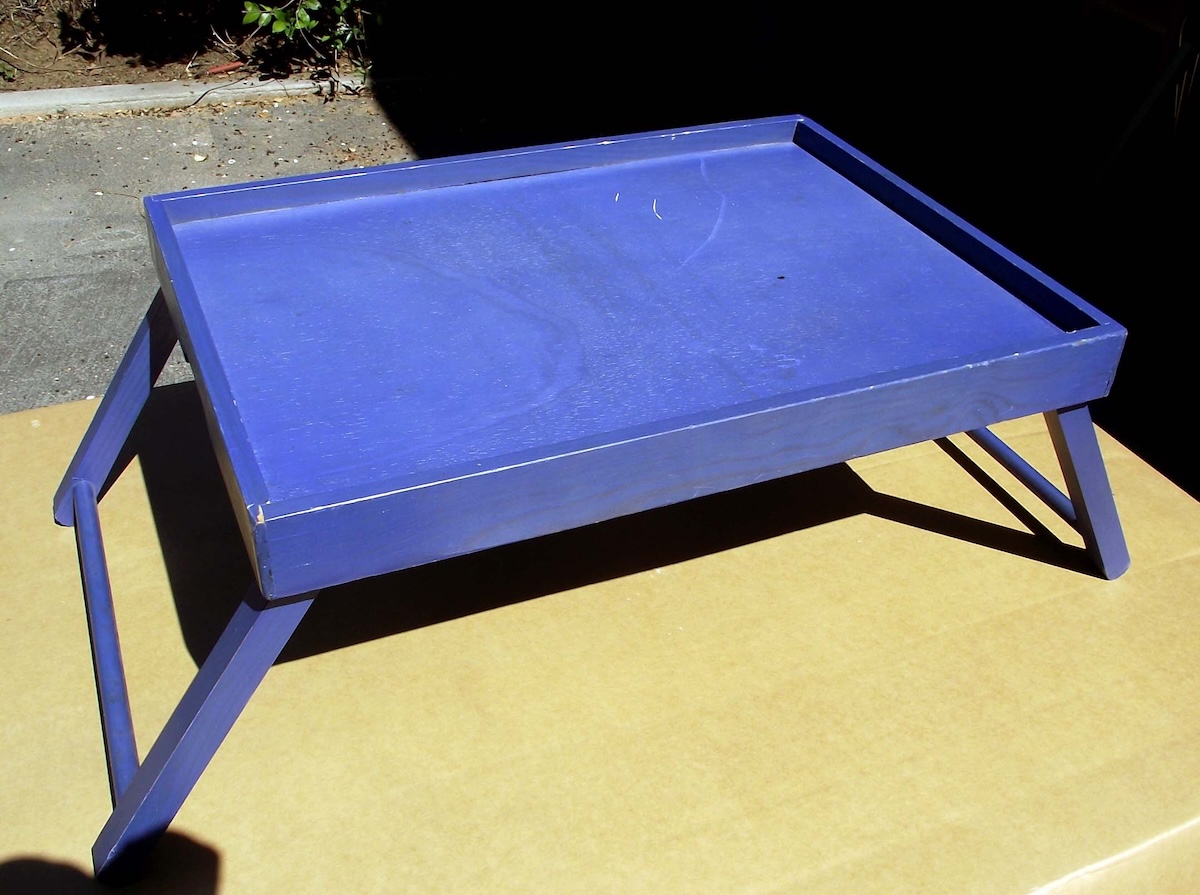
Once I noticed this breakfast in mattress tray marked all the way down to $2.00 at an area thrift retailer, I knew I needed to get it for a resin mission.
Moreover, in a uncommon second of readability, I knew precisely what I wished to do with it and it concerned Mod Podge Switch Medium. There was additionally going to be a pink theme to go together with my kitchen instrument shadow field, rolling pin bookends, and kitchen cupboard {hardware}.
Did I point out that croissants and low have been in my imaginative and prescient as effectively? Right here’s what I did to revamp this breakfast in mattress tray. When you do that you’re going to have to color a tray of your personal ASAP!
Collect These Provides
- Spray paint
- Envirotex Lite 2-part resin package
- Sander
- An outdated candle (not pictured)
- Sandpaper (220-grit and 100-grit)
- Mod Podge Picture Switch Medium
- Mod Podge Furnishings (you should use Challenging Coat as effectively)
- Brush
- Rags
- Printed design
- Trisodium Phosphate (TSP) (elective)
There’s my CROISSANT! (and low . . . I actually wanted some espresso).
Get the printable the best way to under:
DIY Bed Tray
Learn to beautify a thrift retailer discover in this DIY mattress tray desk mission. Resin makes the right waterproof coating for your tray.
Prep Time30 minutes minutes
Lively Time1 hour hr 15 minutes minutes
Dry Time1 day d
Complete Time1 day d 1 hour hr 45 minutes minutes
Yield: 1 tray
Value: $12
-
Clear your floor with TSP and sand, if crucial. This permits the subsequent layer of paint to stay successfully. Wipe away any sanding mud.
-
Rub a wax candle on the sides. A fast rub creates a barrier that stops the spray paint from sticking in these spots. Give the tray two mild coats of spray paint and put aside to dry for a number of hours.
-
Run the 100-grit sandpaper over the waxed edges to take away some paint right here and there, giving an vintage look.
-
Print out the picture of your alternative utilizing a laserjet printer. If you happen to use any phrases – you may have to reverse them when printing in order that they present up accurately when transferred.
-
Apply Mod Podge Switch Medium to the printed facet of the graphic and lay down on the tray. Clean out bumps and clear up any extra medium that has squeezed out the perimeters of the paper. Go away to dry in a single day.
-
Lay a moist towel over the picture for a number of minutes. Start to rub away the layers of paper. Repeat till your picture is totally revealed and no extra paper is left.
-
Use the 220-grit sandpaper to misery the tray and graphic to desired ranges.
-
Cowl the tray with a coat of Mod Podge and let dry for just a few hours.
-
Combine and pour the Envirotex Lite in line with bundle directions. Give at least 12 hours of treatment time earlier than utilizing.
Step 1: I wished an vintage look for my tray with put on and tear on the sides, however I didn’t need the unique vibrant blue shade to point out. I sanded the complete tray utilizing a 220-grit sandpaper (the sanding roughs up the floor giving it “tooth” which permit the subsequent layer of paint to stay higher).
Step 4: I got here up with a design that I preferred – just a few easy textual content on a pink band. I used the font known as “Market Deco” which is obtainable for free at DaFont.com (a tremendous useful resource for free fonts). I work in Adobe Illustrator once I’m designing, however the identical look might be achieved in Canva, primary MSWord utilizing shapes from the graphics bar and the constructed in Phrase Artwork operate. Or you should use photographs.
Mod Podge Switch Medium requires you to make use of a “dry toner” (laser) copy of your graphics, which is obtainable at any Kinkos or Staples in the event you don’t have entry to a laser printer.
Step 9: You don’t *have* to make use of the Envirotex. A brush on waterproof sealer or Engine Enamel (which comes in a sprig) are additionally choices. It will depend on if you need the resin or not.
In case you have any questions on this tutorial, please don’t hesitate to ask – I’ll monitor the location and attempt to get again to you as shortly as attainable. Plus try these different photograph switch concepts right here:
Christmas Napkins • Household Reunion Centerpiece • How one can Switch Pictures to Wooden • Inkjet Switch • Picture Keychain • Picture Switch to Canvas • Switch Paper to Cloth • Switch Pictures to Cloth • Switch to Furnishings • Switch to Glass • Switch to Metallic